Here are the things I may ask you to help you evaluate your horse and saddle fit:
Step 1. Horse / Rider Info
Send me the details about your horse
Age, breed, level of training, size and any medical history
Your height and weight.
What saddle did you currently try to use? Brand, tree size? Seat size
How tall are you? what is your weight?
Send me the details about your horse
Age, breed, level of training, size and any medical history
Your height and weight.
What saddle did you currently try to use? Brand, tree size? Seat size
How tall are you? what is your weight?
Step 2. Photos
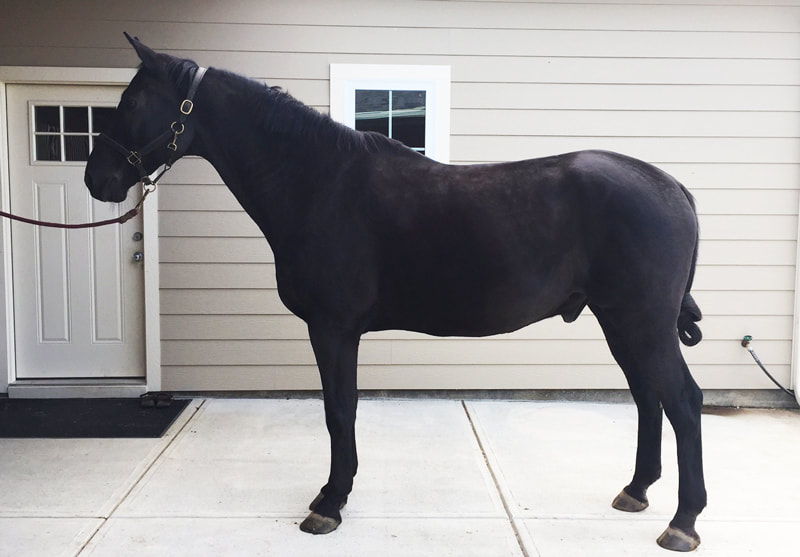
Have a friend help you with this. Please ensure the horse is standing square on level ground with the head straight forward and a solid background and good light.
1. Side View:
Take a photo of the horse from the left side without the saddle. The whole horse should be seen on the photo.
Please try to find a solid background.
One with vertical lines likes the boards in the barn or siding is even better)
2. From the back:
To show the horses shoulders: Stand on a stool and take a photo of the horse showing both shoulders. make sure the horses head is straight and that the horse is completely square with weight on all four legs.
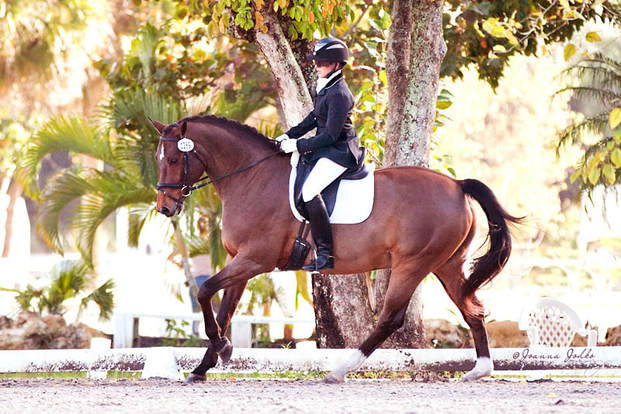
3. A photo of the rider next to the horse or on the horse (sideview) would be helpful as well along with height & weight.
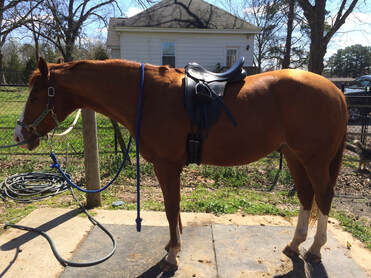
4. A photos of your current saddle on your horse (no pads, from the side, girthed up, horse standing square, head and neck straight)
Once complete please email the pdf files for the tracings and the photos to miriamgraybeal@gmail.com
1. Side View:
Take a photo of the horse from the left side without the saddle. The whole horse should be seen on the photo.
Please try to find a solid background.
One with vertical lines likes the boards in the barn or siding is even better)
2. From the back:
To show the horses shoulders: Stand on a stool and take a photo of the horse showing both shoulders. make sure the horses head is straight and that the horse is completely square with weight on all four legs.
3. A photo of the rider next to the horse or on the horse (sideview) would be helpful as well along with height & weight.
4. A photos of your current saddle on your horse (no pads, from the side, girthed up, horse standing square, head and neck straight)
Once complete please email the pdf files for the tracings and the photos to miriamgraybeal@gmail.com
|

|
|
|
Step 3. Taking tracings
Items you will need
Your Horse :-)
Level ground
A helper to hold the horse square with the head straight
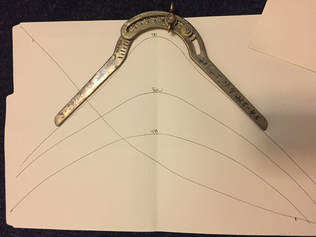
A flexi curve (example at Amazon)
Manila folder or 8.5 x 14 piece of paper
Small pieces of tape or chalk
A marker
A camera or phone to take pictures
A stool to stand on
(Pls note: The gauge you see in the picture on the right is a sprenger gauge and not a tool you will use but one I use here on my end once I have the tracings.)
Level ground
A helper to hold the horse square with the head straight
A flexi curve (example at Amazon)
Manila folder or 8.5 x 14 piece of paper
Small pieces of tape or chalk
A marker
A camera or phone to take pictures
A stool to stand on
(Pls note: The gauge you see in the picture on the right is a sprenger gauge and not a tool you will use but one I use here on my end once I have the tracings.)
How to take tracings
- A. Tree Point Standing on the left side of your horses, find the edge of the scapula (horses shoulder blade) and take your tracing 3 fingers behind that point. Mark that point with chalk or a piece of tape
Standing on the left side, carefully lift the flexi curve up and transfer directly to the Manila folder and mark the left and right side on the folder. Trace the shape of the flex curve on the UNDERSIDE of the curve onto the paper.
I suggest you do this at least twice to check for accuracy.
- B. Base of wither: Find the lowest spot behind the wither and take your second tracing at that point.
- C. T18 (last rib)
- D. Take a tracing on the top of the horses back from Point A to Point C
How to scan & send tracings
Put the following data on the sheet: Your name, horses name, Rider Info and a date
Before scanning, take a ruler and make a line horizontally and vertically with inch marks noted so that I can check the inch marks after I print them to assure its still a 1:1 ratio.
If you use a Manila folder, fold it in the middle and simply scan each side, save as pdf and email both images - Again make sure you scan at 1:1.
I will then print the images on my end. check to make sure the marks you made are still at 1 Inch to make sure I have the correct ratio, and then tape the images together to get the full tracing.
